
Custom Fit Roof Rack Kit With RRVA137B | RRRCH4 | RRRCP45-BK
(136 reviews)
Price: $533.95
In Stock
Custom Fit Roof Rack Kit With RRVA137B | RRRCH4 | RRRCP45-BK
Item # RR98VE
Our Price: $533.95
Will this fit?
To see if this custom-fit item will work for you please tell us what vehicle you'll use it with.
In Stock


- All Info
- Reviews (136)
- Q & A (0)
- Videos (12)
- Photos
Rhino Rack Roof Rack - RR98VE
- Aero Bars
- Crossbars
- 54 Inch Bar Space
- Rhino Rack
- Black
- Overhang
- 2 Bars
Aerodynamic, aluminum crossbars let you build an aftermarket roof rack for your vehicle. Full-length bars provide plenty of space for carriers and accessories. Vortex strips in C-channels reduce wind noise. Theft-deterring plastic locks included.
Features:
Rhino-Rack Vortex Aero Crossbars - Black - Qty 2:- Sleek, low-profile crossbars let you build an aftermarket roof rack for your vehicle
- Slim, elliptical crossbar shape helps to create an extremely aerodynamic system
- Full-length bars extend past roof rack legs to maximize space for carriers and accessories
- Top channels let you add channel-mounted carriers and accessories
- Clamp-on accessories mount conveniently around bars
- Rubberized Vortex strips in top channels dramatically reduce drag and wind noise
- Keep dirt and grime out of crossbars
- Provide cushioning and slip resistance for your cargo
- Bottom channels allow easy installation to Rhino-Rack roof rack legs
- Rulers in channels help to center crossbars on your roof
- Lightweight, structural-grade anodized aluminum bars are rustproof
- Internal H-shaped extrusion provides exceptional strength
- Plastic lock cores with universal keys deter theft of channel-mounted accessories
- Can be upgraded to all-metal locks (RRVA-LEC2 - sold separately) for added security
- Matte black finish
Rhino-Rack RCH Legs - Fixed Mounting Points - Qty 4:
- High-profile legs mount Rhino-Rack crossbars to your vehicle with fixed mounting points
- Locking covers secure roof rack to your vehicle
- Included Allen key ensures legs are securely attached to your roof
- Internal compartment houses Allen key when not in use
- UV and weather-resistant, glass-reinforced nylon construction
RCP Fit Kit for Rhino-Rack RC and RV Legs - Fixed Mounting Points:
- Custom fit kit allows you to mount Rhino-Rack RC or RV legs on your vehicle with fixed mounting points
- Threaded studs screw into fixed mounting points to provide attachment point for legs
- Legs slide onto studs and secure with hex bolts
- Molded-rubber pads are designed to fit the contours of your roof
- Protect your roof from scratches and abrasions
- Precision-molded inserts cover bases when the legs are removed
VA137B Rhino Rack Vortex Aero Aluminum Cross Bar - Black - 54" Long
RCH4 RCH Legs for Rhino Rack Vortex Aero and HD Crossbars and Pioneer Trays - FMP - Qty 4
Replaces Rhino-Rack RLCP01, RLCP04, RLCP06, RLCP09, RLCP12, RLCP13, RLCP15. RLCP19, RLCP20, RLCP24, RLCP25, RLCP27, RRRLCP31, RLCP32, RRRLCP33, RLCP36, RRRLCP37, RLCP40, RLCP41, RRRLCP43, and RRRLCP45
RCP45-BK Custom RCP Fit Kit for Rhino Rack RCH, RCL, RVH, and RVL Series Roof Rack Legs - FMP
Video of Custom Fit Roof Rack Kit With RRVA137B | RRRCH4 | RRRCP45-BK


Videos are provided as a guide only. Refer to manufacturer installation instructions and specs for complete information.


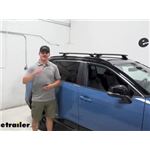
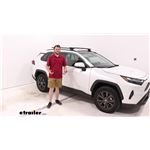
Video Transcript for Rhino-Rack Vortex Aero Crossbars Roof Rack Installation - 2020 Toyota RAV4
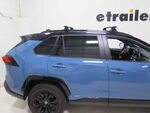
Hey, everybody, Cooper here at etrailer. Today we're going to be taking a look at the Rhino-Rack Vortex Aero Roof Rack System on our 2020 Toyota RAV4. Now, why would you need a roof rack system Well, if you wanna carry around some of those bigger items like kayaks, snowboards, maybe even skis, or need some extra storage space in case our car is full of people, something like a rooftop basket or rooftop box would all be excellent accessories to carry around. But before you get any of those accessories, the first thing we're going to need is a roof rack system like we have here today. Our RAV4 today is going to have flush rails which means that we are going to have the kit that includes three pieces. First off, we're gonna have an adapter from our rails to form the base.
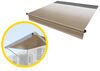
Then we're gonna have a leg that's going to secure down to the base. And then finally, we're going to have our crossbar that secures into our leg. Has this nice aero shape to it here, which really just helps cut down on some of that wind noise that you're gonna have when putting something on top of your roof. In conjunction, we do also have a weather strip here on the top which again just helps cut down some of that wind noise. With this type of weather strip though, if you want to mount any T-track accessories, we are going to have to pull it up and cut out the holes for our T-track accessory feet.
In order to access that T-channel, we actually come here to the front of it where there is this lock with our included key. Our roof rack system is weight rated for 165 pounds, but do keep in mind that our rails and our roof will have separate weight ratings and that we wanna make sure we are accommodating for the lowest component of all three. That way, we're not overloading any of the systems and causing damage to anything on our vehicle or our roof rack. Since this is a fixed point roof rack, we are going to have a crossbar spread of about 31 1/2 inches. And since these cannot move around on our roof at all, that is fixed, and that's going to be the number every single time, but that is more than enough of a crossbar spread to accommodate all sorts of accessories.
The system we have on today does use 49 inch crossbars, which I think is the perfect number for our RAV4 here today because there is a little bit of overhang on each crossbar, which will allow us to use some of those clamping accessories, but there's not enough overhang that you start endangering your head getting in and out of your vehicle. Now our install process is pretty straightforward. The only real snag in it is the fact that there is a bolt on your leg that you're going to have to tighten down, that is on the bottom, so just a little harder to access. Thankfully, we're going to show you the install process and what we found to use as a workaround. Now to start our install process, I like to take all our components and lay them out on the table in front of us.
As you can see, we've already installed our rear crossbar. For the front crossbar, steps are very similar, so the steps are gonna be applicable for both. A couple additional tools that I would highly recommend having is something like a shop towel because we're gonna see later, we're doing some very close work on near our roof, a screwdriver, 'cause we're gonna have to pop the plates up on our flush rails, a tape measure for a couple measurements that we're going to need earlier, and then the instruction book actually requires that you get a ratcheting tool to secure one of our parts down later. But coming to our crossbar, we're going to determine the direction using the Rhino-Rack logo here, making that the front of our crossbar. We're gonna go ahead and just roll that over after we install the weather strip. We've already done so because this is not a permanent fixture on the car, so not a step that we have to be too concerned about. Whenever you get the legs for your Rhino-Rack system, they're going to come like this straight out of the box. So the first step we're going to need to do is go ahead and unlock it using our included key so we can expose all the inner workings here that we're going to need later, doing that for both. And then in order to stall the fixed mounting point for our leg, we're going to come down to the bottom where there's a hole here, and then there is a included bolt with some washers that we're going to need to go ahead and feed through the top of that and then take our metal plate right here and screw that down into place. But you don't want to have it too tight because we are going to need to feed it through our crossbar here in a moment. So just doing that for both of our legs here means that they will be ready to install. Your kit is going to come with a measurement strip like this one that we are going to simply go ahead and install into the bottom of our crossbar. And then on your instruction manual, you will receive a certain measurement that will tell you what number that our legs are supposed to sit at and you would go ahead and cut that to leave only that section revealed. Since this is our demo kit, we're not gonna cut that today. We are just going to go ahead and install the feet through onto our crossbar, and I'm going to tighten them down a little bit right now because we'll see later on in our installation that accessing this once we put it onto the roof of our vehicle does get a little tricky, so it's nice to have it semi tightened right now. This space loose enough that we could still move it but tight enough that it's not just totally loose would make it a lot easier for us down the road. Now with our crossbar ready, there is going to be some prep work that we have to do on our flush rails. That's where these are going to come in. There are four different ones in total, each with a unique code. For instance, this one is 2030, this one is 2029, and those have corresponding points on the vehicle that you'll see in the instruction manual. Or you can just go ahead and look at the letters under them. This one is FR or front right, means going to be on our front crossbar on the passenger side, right And this one is FL or front left, means going to be on our front crossbar, left side, or our driver's. So we are going to go ahead and take our screwdriver, pop out the plates and get these settled down into place. Now we just need to go ahead and take our screwdriver and very carefully, pop out these plates, setting that down to the side. You can go ahead and take our block and it does just nestle in here with that arrow facing towards the front of our vehicle, and we're going to take the included nut and tool and just go ahead and tighten this down. After you go ahead and repeat that step on your driver's side, that means our roof's all prepped and we're ready to install our crossbar. Now on our crossbar, we do have these neat little tabs here that are going to nestle into those that we just go ahead and set up. So we're just gonna go ahead and come to the front of our vehicle, reach to the other side until those fall into those holes, and then go ahead and set this down in there. And now we're going to take the steps to secure this down into here. Now you're gonna see one of the reasons that we left our legs here a little bit on the looser side 'cause as we push our crossbar over, we need that to kind of expose the point where our leg is going to sit into our face. So we're just going to simply drop our bolt in there and grab our ratcheting tool, putting that in there and securing this down to the base. Then after you get this tightened down completely, you gotta go ahead and repeat this process on the other side. We can make sure that our crossbar is even between our driver and passenger side. In a situation like this, what I find really helpful to do is to actually bring all of your crossbar to one side, take your tape measure, put it up against your crossbar, and we can see that sitting about at 6 1/2 inches. So we're actually going to pat this side down till it reaches about 3.25 inches and then double check the other side to make sure that it's also at that measurement. Now with our crossbar measurements confirmed, we're going to tighten down our crossbar to the leg. And that bolt is actually on the bottom side of our leg now, that's where our shop towel is going to come in just to make sure we don't deal any additional damage to our roof. Now for this, you can use the included Allen key if you want, or if you have the correct head size for that ratcheting tool that we had to use earlier, you can just go ahead and swap that out and this makes it a lot easier. And this is another reason that we kept those legs tightened down earlier just so that we are not starting from a completely loose point when doing this. It makes it a little bit easier to get into that groove and tighten it down. Last thing we need to do is put all our end caps on. The end cap for our crossbars are going to be this plastic lock core here that use this unique blue key to lock them into place, while our leg crossbar is going to be this end cap which comes with a metal lock core that uses a metal key. Now, if you did want to use a same key system for these, Rhino-Rack does offer a option to swap out these plastic cores for a keyed alike system so you could have one metal key instead of carrying around these two different keys for our crossbar system. After that, we're just gonna go ahead and give it a little bit of a shake test to make sure everything's down and in place. And it seems like everything is pretty sturdy, so that means we're all good to go. And overall, I think on our 2020 Toyota RAV4, it has a really nice clean and sleek look. And we saw it here at etrailer.com. Thanks for watching.
Customer Reviews
Custom Fit Roof Rack Kit With RRVA137B | RRRCH4 | RRRCP45-BK - RR98VE
Average Customer Rating: 4.7 out of 5 stars (136 Customer Reviews)
Aerodynamic, aluminum crossbars let you build an aftermarket roof rack for your vehicle. Full-length bars provide plenty of space for carriers and accessories. Vortex strips in C-channels reduce wind noise. Theft-deterring plastic locks included.by: David07/04/2023
I wanted to share the items I used to be able to haul two Wilderness Systems Tsunami 145 kayaks on my 2006 Scion xB. This may help others who struggle with deciding what to use. I am pleased with my purchase and hope this helps. I originally thought I wanted the Thule Hull-A-Port Aero, but they discontinued making the fit kit for their roof rack systems and I ended up going with the Kuats. I am glad that they didn’t make the fit kit for approximately $[XX] and so they missed out on the rest of my business. Here are the items I used for anyone interested – pictures included. Custom DK Fit Kit for 4 Rhino-Rack 2500 Series Roof Rack Legs - Naked Roof #DK138, Kuat Class 4 V2 Kayak Carrier w/ Tie-Downs - J-Style - Folding - 1 Kayak - Black #KU53VR and these are really cool, Rhino-Rack 2500 Series Legs for Vortex Aero Crossbars - Naked Roofs or Fixed Mounting Points - Qty 4 #RRRLKVA, Rhino-Rack Vortex Aero Crossbars - Aluminum - Black - 54" Long - Qty 2 #RRVA137-B2. The 54” crossbars fit really well and the perfect length in my opinion and it doesn’t stick out like the longer ones would. Also purchased two sets of these Malone QuickLash T-Style Hood Loops for Bow and Stern Tie-Downs - Qty 2 #MPG308.


by: Michael 11/14/2022
Look great, and function great. Just make sure you find all the parts packaged inside the rails themselves after you open the box!
by: Tyrone Guy04/26/2024
Great strength and look. I love em. About to put on the kayak racks and get some fishing going.


by: Michael J.04/10/2016
I own a 2013 Honda CRV I purchased a couple months ago. It has a naked roof and no rack or side bars, and I wanted to be able to carry up to three kayaks. I didn't really want to buy and install the side bars, and then the cross bars also. I also needed the cross bars to be a little wider than the vehicle itself, as I own two Ocean Kayak Scupper Pros, and a Venus.
This Rhino Rack package looked like a great option for my needs. Weight wise, the three boats come right to the limit. Other racks had lower weight limits, and wouldn't work.
I had a couple issues with the initial package, but etrailer took care of the problem right away, and sent out what I needed.
Installation was pretty smooth. I recommend reading and rereading the instructions, before you cut anything. The videos on the etrailer website or directly on YouTube are very helpful to see all the steps. I'd like to see more personalized instructions added in the future, just to to make everything even smoother. Make sure you identify your vehicle and the bar you received on the kit instructions before you start.
These bars are so wonderful. The aero bars make no noise when driving and no whistling that I can tell. They don't seem to effect my gas mileage. I made sure the top rubber strips and bottom measurement strips were cut perfectly with no gaps, as this is important to prevent whistling.
They look so stylish. I get complements on them, and people can't believe they are after market, and that I installed them myself. They really complement the vehicle. Once installed the first time, I can take them off or put then back on in about 12 minutes. I don't really plan to take them off though. I don't use car washes, and I like the look of them on my vehicle.
I made sure to not overtighten them, and then tightened them a few times over the next week and with a couple kayaking trips. These babies are strong and I can't make them move when I test them. I still check them regularly to make sure they are secure, for safety purposes.
I highly recommend this Rhino Rack package. They know how to make the perfect roof rack and you can tell the quality and thought that went into them. Look at my photos I have included.
Thank you to etrailer for such great service. You made the whole process so pleasant and easy.


by: Konstantin03/15/2022
I give all 5 stars for the product and service, but...I prefer the parts to be all in one carboard, also I was a little panicking looking for blue plastic key...It was inside of cross-bar ??not falling out with strips. Anyway,
I"m owner of Honda cr-v 2022 with bare roof ,and I just installed the rack. Was it simple enough? Yes,so I can share this:
First, rubber pads are all the same, and after placements to plastic legs should be placed with arrow*out*-that is it(a lot of info regarding vertical parts, that they are all different)??
Second, on other hand, in video we informed that clamps are same -they are not. Bigger "hooks" are for rear bar, smaller ones-for the front one.
Third, do not expect precision in rubber pads position(especially on rear bar)regarding plastic rail strips on bare roof.it is not achievable, just try to make same look on both sides.
I was worried about rain and water gets inside. Well, let us see.
What I plan to care on rack? Just a small 6ft step ladder. Believe me or no CR-V is my business vehicle ,and ladder carry was the goal of rack purchase. And only question I have if I can get to underground parking with no problems to cross the front entries usually limited with 6 ft in heights I will find out soon, but rack height plus ladder on it makes me worry.??The review will be update soon. regards.


by: Eric07/31/2022
Holds two kayaks on the roof rock steady. Did some highway miles, back roads, bumpy roads, all locked in place. The problem is that when there are no kayaks up there, the wind creates a very loud whistle sound that grows with the speed. Its gotten so bad that we tend to avoid using the car these are on for anything but driving kayaks around. Probably going to have to remove them for daily driving and put them on again when its kayaking time.
by: JoAnne01/03/2024
These crossbars are perfect! I have a Pelican Cargo Box that I put on the rack when I'm traveling and it is 100% secure. They are pretty noisy, especially when driving perpendicular to the wind direction, but I expected that considering they are sitting on top of a tall truck. The rubber pieces that fit into the tracks are still in good shape and haven't cracked or loosened. They look good on my all black truck, too.
by: Chris aka Mad Dog Hawaii02/15/2017
These Aero Racks are perfect on my Scion XB, stylish cool look & importantly Quiet with absolutely no wind noise! Also bought the Rocky Mount Cargo Basket & it comes WITH a full bunji net cover. It is also quiet with no wind noise & you can tie surf gear on top like racks (use padded rack pads) & or put things inside for more carrying space. Also a cool stylish look on the Scion XB or any other compact car like my wifes Toyota Yaris... We move it back & forth to who ever needs the Cargo Basket for the days Adventure.


by: Robert01/06/2020
I purchased a full kit for my 2017 Ford explorer, connectors, Feet and these cross bars. I will use them for hauling my roof top box on trips as well as other things that will not fit in my vehicle. The install is farily simple however some of the tools provided for tightening are not the best. Luckily I had a number of other tools to get this complete. The main thing I feel is needed is a socket allen key to tighten down the cross bars nice and tight. The allen key provided is difficult to work with and get the leverage you need to snug the bars down.
Another tip is to be sure to use the excess measuring closure to close off the inside of underside of the bars. Use a box cutter to cut the excess and fit it to the inside. I read some reviews about noise and I have zero noticeable noise. Do not tighten the bars down until you have this all inserted in and slid under the feet. Then snug it all down. If you do these things and close all the gaps the bars are almost silent.
The bars look great on the vehicle and seem very sturdy and solid. I would have no reservations hauling ladders, lumber and all of the typical stuff you see on roof racks. The rubber strips are heavy duty and add a nice non slip feel to the top of the bars.


by: Bill01/24/2021
I purchased Rhino-Rack Vortex Aero Crossbars with Rhino-Rack 2500 Series Legs (RRRLKVA) and Fit Kit (DK284) for my 2020 Honda CR-V EX Hybrid. The rack was easy to assemble and took about an hour. The only tool not supplied that you need is a sharp knife or scissors to cut the rubber strips to length. Once assembled, the installation took about 30 minutes, making sure to measure accurately for placement. I used blue painter's tape to initially mark the locations. I then placed the white marking arrows (supplied) to align with the marks on the tape. I then removed the tape, placed the racks aligned with the arrows, and tightened the clamps.
This product seems well made and engineered (I'm a retired mechanical engineer). Kudos to Rhino-Rack and to etrailer for selling it.


by: Chug04/11/2024
I liked doing business with you. I like the products I ordered. I did have trouble with part of the shipping. It was not your fault, but the part of the shipping you used The USPS did not work. I neverrnecieved the item from them and you had to ship me another via UPS. Over the last 10 years I have had a number of problems with the USPS with packages and mail. They are especially difficult to get information from when something seems to be lost. I would recommend not using the USPS for your shipping needs. Again, I am very happy with you and the products I bought from you.
by: Neil12/25/2023
Very nice bars that I mounted on a 2019 Highlander. I have owned multiple vehicles with Thule square and Yakima round bars that were noisy. These are so quiet I don’t know they are there. Very sturdy, and the rubber insert helps to keep load from sliding.
by: Steeve12/17/2022
Good sturdy product. Only reason I don't give 5 stars is that the lockable plastic cover on each ends of the bars, some don't lock, seems like a little lack of adjustment. Other than that, very satisfied.
by: Matthew12/15/2018
Fairly easy to install onto my 2017 Honda CR-V. The crossbars feel very sturdy and are securely attached to the vehicle. Took me about 30 minutes to get it installed and could be done even quicker if you get help from another person. The bars themselves are a little fat so my Thule ski rack has a super tight fit. There is very minimal wind noise, so I'll probably be getting a fairing for that. The instructions felt a bit jumbled but with just the measurements alone, you can install it with a bit of common sense.


by: Ian R. 03/22/2017
I used this rack to mount two 65lbs kayaks to my vehicle and travel. One of many trips was over a thousand miles (round trip) and they moved maybe half a centimeter a piece during. I was extremely pleased with how easily I could adjust them. The original shipment had everything that was supposed to be in it and the directions were realitively clear. I had them together and on in roughly an hour. Also, they look great. When they are off the roof the only issue I have arises. The rubber feet that sit directly on the roof tend to fall off easily. Not a big deal.


by: Dennis Marriott06/29/2021
The crossbars are great, but the rubber strip in the middle gets bunched up or comes out when loading heavy items across the bar. But the rubber provides grip, and the grip is amazing. I am not worried about kayaks or rafts sliding around. I do need longer ones though...


by: Thai01/14/2021
This is Thai Khuu ,Thanks I got packaged ,and I already installed, It just take about 1 and 1/2 hour,but I just take time to do carefully,so it is took me 2 hours, It is great ,me and my wife like it,and I my order the other package exactly like this for my second acura mdx 2016, I enclosed the pictures installed roof rack , Thanks


by: Warren03/08/2024
Exactly what I was looking for but listed as 'not verified for my vehicle' used with the SX009 on my 2024 Seltos S. Looks right to me.


by: S. Alexander04/08/2021
We love these racks! They were easy to install with the website videos. They whistle a bit but honestly it’s not terrible. The racks we got for our kayaks fit perfectly. Bonus - I can still open the panoramic roof!


by: Michael02/10/2022
Very straight forward to install. Took about a half hour in total. No whistling whatsoever. They look awesome on my 2016 Ford Explorer Sport! Especially with my running boards and tires...
Waiting on my Rhino basket to get here to install that next!


by: Tito03/27/2017
Solid platform for all your gear. Easy to install and adjust, great looking as well. Initially I was frustrated because I failed to insert the plastic ruler under the cross bar. If you don't cover all the gaps they will whistle like crazy!
The instructions don't tell you that...I had to call Rhino tech support. They are quiet now at any speed.
I'd buy them again for sure!


by: Matthew 05/02/2024
Great design and surprisingly quiet on my Avalanche.
by: Joseph04/13/2023
AERO BARS HAGING IN THERE.THE ONLY THING THAT I DIDNT LIKE ABOUT THE AREO BARS IS PUTTING ON A ROOF RACK. ONCE FITTED AND ADJUSTED THE RUBBER ON TOP OF BARS IMPRESS INTO THE BAR. FIXING THAT I CUT SOME RUBBER PIECES TO COVER THE IMPRESSIONS. STILL A GOOD PRODUCT.
by: Matthew06/19/2018
Extremely sturdy and well made. I also like the locking endcap design. Only thing I dodnt like is the rubber channel strip is 4 separate pieces instead of one long strip. Maybe they do that so you can remove a section for installing accessories, but id prefer to simply cut it where needed.


by: MissChiVus109/10/2023
The Rhino Rack BLOCKS my SUNROOF. It was recommended for my 2018 Highlander on the etrailer website. A 2018 Highlander with a sunroof is shown on etrailer in the install video. Even though the rail came in with damage, due to poor packaging for shipment, I installed it because I did not have time to exchange it. Now, I can not open my sunroof! etrailer refuses to refund or exchange it and have no options for fixing this issue!
25
3298
Show More Reviews
See what our Experts say about this Rhino Rack Roof Rack
- Roof Rack for 2019 Jeep Grand Cherokee without E Group Flush RailsThule used to have a fit for your style of non-E-group roof rails but at this time they do not have anything. Best option we have is the Rhino Rack Aero Bar roof rack part numbers # RRVA137B-2, # RRRLKVA, and # DK234 which fits to the outsides of your flush rails more like a naked roof fit.
view full answer...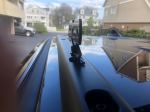
- Recommended Roof Rack for Basket and Bag on 2017 Honda Pilot with Bare RoofAny of the aftermarket roof racks we offer that are designed to fit your 2017 Honda Pilot can be pretty easily removed if desired, but all still have the capacity to safely support a carrier and bag during travel. In fact with most roof rack systems (even "temporary" systems) you will really be limited by the capacity of the Pilot's roof itself, as the roof racks are generally rated higher. I took a look at the online version of the owner's manual for your Pilot and it does list a 165...
view full answer... - Can I Put A Trailer Hitch On A 2018 Lexus 450H LAt this time we do not currently have a trailer hitch confirmed for your 2018 Lexus 450H L. If you were going to use the hitch for hauling bikes you could use The SeaSucker Hornet Rear Window Bike Rack for 1 Bike - Handlebar Mount - Vacuum Cup Mounted # 298-BH1302. The carrier installs in seconds with vacuum cups that won't scratch or dent your Lexus RX 450h L. Stores in your trunk or luggage when not in use. It has a weight capacity of 35 pounds, and has a pull strength of 120 pounds per...
view full answer... - Does Thule SUP Shuttle Carrier Fit 2016 Honda CR-V with Naked RoofYes, I checked with Thule just now and the Thule SUP Shuttle part # TH811XT is a confirmed fit for your 2016 Honda CR-V but you will need a roof rack installed like the Rhino Rack roof rack part numbers # RRVA137B-2, # RRRLKVA, and # DK284.
view full answer... - Recommended No-Drill Roof Rack for a 2022 Toyota Tacoma Access CabThe Rhino-Rack Vortex Aero Crossbar System part # RRVA137B-2, part # RRRLKVA, and part # DK174 is what I recommend for a 2022 Toyota Tacoma Access Cab. This is a great system with aero crossbars that reduce wind drag/noise, uses clips that clamp onto the door jambs for a no-drill install, and have integrated crossbar channels for use with channel mounted accessories. This is a complete kit that has everything you need to start hauling gear on the roof.
view full answer... - Roof Rack For 2015 Hyundai Santa Fe GLS or Limited w/ Flush Rails & Largest Thule Cargo Box FitLet's go ahead and start with the roof rack for your 2015 Hyundai Santa Fe with flush mounted rails, and since you mentioned having 7 seats that means you have a GLS or Limited model, and the best option for a roof rack is from Rhino-Rack. Not only does Rhino-Rack give you the best overall value for a roof rack on your '15 Santa Fe, it also has the longest crossbars (54" to fit the most gear) and is the simplest to install, as you need only two pieces. The correct parts are the following: -...
view full answer... - Will Thule Accessories Fit the Rhino Rack Roof Rack for a 2015 Ford EscapeYes, the Thule accesorries designed for their square bars will fit the Rhino Roof Rack square bars if you already have them. If you don't they have discontinued that option and I instead recommend the Aero system that consists of part number # RRVA137B-2, # RRRLKVA, and # DK375 that has been confirmed to fit your 2015 Ford Escape with a naked roof.
view full answer... - Roof Rack Recommendation for 2017 Honda CR-V With Naked RoofThere is a really good option for a roof rack that is not difficult to install and will fit perfectly on your 2017 Honda CR-V with a naked roof, and I highly recommend going with Rhino-Rack. I really like the Rhino-Rack option because not only is it strong, quiet, and durable, it offers a better value because it is more economical than similar brand roof racks while not sacrificing anything in terms of quality. The parts that make up the Rhino-Rack Roof Rack for your 2017 CR-V with a...
view full answer...
- Recommended Roof Rack And Lock For Ladder On 2016 Ford EscapeIf you have the factory side rails on your 2016 Escape I recommend a roof rack like the Thule SquareBars. This roof rack features 53-inch square load bars, and has locks to secure the roof rack to the top of your vehicle. It has a 150-lb weight capacity. To order this roof rack you will need part # TH712400 and part # TH710401. If you have no side rails on your roof, I recommend the Rhino Rack Square Bar Roof Rack. This roof rack installs in the fixed mounting points on the roof of your...
view full answer... - Recommended Rhino-Rack System to Carry Luggage Bag on 2019 Toyota Tacoma Double Cab RoofTo install a Rhino-Rack system on your 2019 Toyota Tacoma Double Cab naked roof you need a clamp system that uses the following parts: - 54" Vortex Aero Crossbars # RRVA137B-2 - 2500 Series Legs # RRRLKVA - DK Fit Kit # DK174 If you'd rather have the Pioneer Platform Rack then your best bet is part # RR26QX instead. This does require drilling but it just has the ditch mounts so the drilling is minimal compared to the other Rhino-Rack mounting options. The thing I really like about...
view full answer... - Best Roof Rack Options for a 2015 Ford Edge with Glass Panoramic RoofYes, we have a few different roof rack systems that will fit your 2015 Ford Edge w/ the glass panoramic roof. For the popular roof rack I recommend the Rhino-Rack Vortex Aero Rack System, # RRVA137B-2 Vortex bars, # RRRLKVA 2500 Series Legs, and the # DK435 fit kit. This Rhino-Rack system has a 165 lbs capacity and aero bar design make the bars aerodynamic to help reduce wind drag and noise. The Vortex system also has a sleeker low-profile design that is aesthetically pleasing to the...
view full answer... - Recommendation on a Roof Rack for a 2013 Honda AccordThe SportRack Square Bar Semi-Custom Fit Roof Rack, # SR1010, is rack that can fit on the 2013 Honda Accord, but since the mounting feet are not specifically designed for the Honda Accord roof then sometimes installation can be difficult. I recommend looking at a custom-fit rack that has been designed and test fit for the 2013 Honda Accord. The Rhino-Rack roof Rack for the 2013 Honda Accord, parts # RRVA137B-2, # RRRLKVA, and # DK359, was designed to fit 2013-2017 Honda Accord 4 door...
view full answer... - Transporting 2 Kayaks while Pulling Trailer with 2014 GMC Sierra 2500As you referenced in your question, there are a variety of potential options for transporting your kayaks while towing an enclosed trailer with your 2014 GMC Sierra 2500. To avoid any possible interference issues and concerns regarding the integrity of a dual hitch for this application, I recommend going with a complete roof rack system on your Sierra. This will also allow you to still use your dual hitch for a bike rack as you mentioned. The Rhino-Rack Aero Bar Roof Rack, which consists...
view full answer... - Roof Rack And Tie-Downs For Surfboard On 2016 Hyundai Santa Fe With Flush Rails On RoofAs long as you use a good tie-down system on your Santa Fe you should not have a problem with the surfboard flying off. The roof rack I recommend is the Rhino-Rack Vortex. This features black aluminum aerodynamic crossbars that help to reduce wind noise and drag. for this roof rack you will need part # RRVA137B-2, and part # RRSX032. To carry the surfboard I recommend a tie-down kit like part # RRRWP03. This included 21-1/2 inch pads and 2 tie-downs to secure the board to the crossbars.
view full answer... - How to Carry 4 Bikes on a 2006 Scion xB that has a Class I Curt Trailer Hitch InstalledThe trailer hitches for the 2006 Scion xB, including Curt hitch # C11487, can only handle a maximum of 2 bikes. Both bike rack manufacturers and hitch manufacturers agree on that point. The issue is not that it is too much weight but how far that weight is from the receiver. A third and subsequent bikes will be far enough from the receiver to increase the stress and leverage on it which can damage the hitch, vehicle, and bike rack. Curt also says you have to use stabilization strap # 18050...
view full answer... - Could Thule Motion XT XXL Fit Rhino Rack Roof Rack of 2016 Honda CR-V and Allow Hatch to OpenSo the Rhino Rack roof rack part numbers # RRVA137B-2, # RRRLKVA, and # DK284 will fit with the Thule Motion XT Rooftop Cargo Box # TH629906 that you referenced but you're going to need to take one simple measurement to determine if it will allow the rear hatch to open. Check out the picture I attached an measure from the point right in front of the door pillar back to the rear hatch seam. If that distance is greater than 55 inches the box will fit without interference. If you get a lower...
view full answer...
- Trailer Hitch and Roof Rack Recommendation for 2020 Honda Pilot with NakedThe etrailer hitch part # e98840 is a great hitch option for your 2020 Honda Pilot as it has plenty of towing capacity, installs easily, and has a mostly hidden appearance. Since you said you need a roof rack and crossbars that to me sounds like your Pilot currently has a naked roof so for a roof rack solution the Rhino Rack part number # RRVA137B-2, # RRRLKVA, and # DK444 is a fit for this and is a great option because the bars aerodynamically shaped which helps reduce wind noise and...
view full answer... - Roof Rack to Mount a Thule SnowPack Ski Carrier to a 2012 Honda CR-VIn order to use the Thule SnowPack ski carrier # TH7325 your 2012 Honda CR-V will need to have a roof rack. If your CR-V has a naked roof with no side rails that run front to back then the most cost-effective compatible roof rack is from Rhino-Rack using the following parts: Crossbars # RRVA137B-2 Feet # RRRLKVA Custom clamp kit # DK284 If the CR-V has the flush side rails that run front to back then you can use Rhino-Rack roof rack # RRRVP33 which attaches to the side rails without...
view full answer... - Will the Rhino-Rack Sunseeker Awning Work With Rhino-Rack Euro Bar CrossbarsI do have an option for you to use the Rhino-Rack Sunseeker Awning part # RR32132 on your 2018 Nissan Frontier but the Sunseeker is not compatible with the Rhino-Rack Euro Bar Crossbars nor is there an adapter for this. Therefore, your only option would be to swap out the Rhino-Rack Euro Bar Crossbars for the Rhino-Rack Vortex Aero Crossbars part # RRVA137B-2. There would be no other adapters required for the Rhino-Rack Vortex Aero Crossbars.
view full answer... - Roof Rack and Kayak Carrier for 2010 GMC Sierra Crew Cab for Two Sit-On KayaksThe first thing I suggest is to confirm the combined weight of your two kayaks; this will allow you to verify that the truck's roof has the needed capacity for that weight load plus that of a roof rack and rack-mount kayak carrier like the multi-kayak Thule Stacker # TH830. Using this single carrier might help with the total weight since it handles up to 4 boats but weighs only about 8-lbs. You can then compare this to the roof weight capacity noted in your GM owner's manual. Roof racks...
view full answer... - How To Carry a Canoe On a 2016 Ford ExplorerIn order to carry a canoe on a 2016 Ford Explorer you'll first need to start with a roof rack, the Rhino-Rack Vortex Aero Crossbar System part # RRVA137B-2, part # RRRCH4, and part # RRRCP45-BK is a great cost effective option. In order to secure the canoe, the Lockrack Adjustable Watersport Carrier part # LR54FR is what I recommend as it's one of the very few options which can be locked.
view full answer... - Rhino-Rack Roof Rack for 2014 Hyundai Santa Fe Sport with Roof RailsFor your 2014 Hyundai Santa Fe Sport with factory roof rails order parts # RRVA137B-2 and # RRSX032. Since all roof racks make some amount of noise when you drive, most owners tend to keep a sunroof closed after a roof rack is installed. If you install carriers for bikes, kayaks or luggage on the roof rack these items' mounting hardware may interfere with the sunroof even if the roof rack itself does not. Those other carriers will also make their own noise! The general wisdom is to keep...
view full answer... - Could 59” Rhino Rack Aero Cross Bars Fit on 2017 Ford ExplorerSince the track on the underside of the Rhino Rack crossbars does not run the full length of the bar and it is what the feet of the rack attach to we can't guarantee you'd be able to fit the longer bars on your rack. I can say that when we installed the 54 inch rack part numbers # RRVA137B-2, # RRRCH4, and # RRRCP45-BK on a similar Explorer we found there was several inches further to the inside that the feet of the rack could attach to so I would be inclined to believe that the longer...
view full answer... - Roof Rack Solution for 2010 Nissan FrontierSince the Q-tower racks have been phased out Yakima does not have any fits for the 2010 Nissan Frontier. For a great rack at a great price the Rhino Rack part numbers # RRVA137B-2, # RRRLKVA, and # DK108 would work well. This is a square bar roof rack at a price that is much lower than the Yakima racks yet gives you a very high quality rack.
view full answer... - How To Carry a Canoe On a 2016 Ford ExplorerIn order to carry a canoe on a 2016 Ford Explorer you'll first need to start with a roof rack, the Rhino-Rack Vortex Aero Crossbar System part # RRVA137B-2, part # RRRCH4, and part # RRRCP45-BK is a great cost effective option. In order to secure the canoe, the Lockrack Adjustable Watersport Carrier part # LR54FR is what I recommend as it's one of the very few options which can be locked.
view full answer... - Could 59” Rhino Rack Aero Cross Bars Fit on 2017 Ford ExplorerSince the track on the underside of the Rhino Rack crossbars does not run the full length of the bar and it is what the feet of the rack attach to we can't guarantee you'd be able to fit the longer bars on your rack. I can say that when we installed the 54 inch rack part numbers # RRVA137B-2, # RRRCH4, and # RRRCP45-BK on a similar Explorer we found there was several inches further to the inside that the feet of the rack could attach to so I would be inclined to believe that the longer...
view full answer... - Roof Rack and Kayak Carrier Recommendation for 2019 Toyota HighlanderI recommend the Rhino Rack roof rack for your 2019 Toyota Highlander because the rack gives you aero shaped bars which will be very quiet, the racks are easy to install and well made, and because most roof racks that are nice as this cost quite a bit more. Now if you have the flush mounted rails on your roof that run front to back you'd want the part numbers # RRVA137B-2, # RRRCL4, and # RRRCP31-BK. Or, if you have a totally naked roof you'd want the part numbers # RRVA126B-2, # RRRCH4,...
view full answer...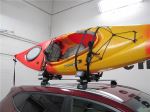
- Correct Rhino-Rack Legs For Rhino-Rack Crossbars On A 2022 Toyota Highlander I went ahead and verified through Rhino-Rack that the correct legs for your 2022 Toyota highlander are the: -RCH Legs for Rhino-Rack Crossbars and Pioneer Platforms # RRRCH4. These legs are compatible with the Custom RCP Fit Kit for 4 Rhino-Rack RC and RV Series Roof Rack Legs # RRRCP37-BK that you currently have and will work great with the Rhino-Rack Vortex Aero Crossbars - Aluminum - Black # RRVA126B-2. Additonally, these legs are also compatible with Rhino-Rack platform racks like...
view full answer... - Recommended Roof Rack for a 2022 Toyota RAV4The best roof rack for your 2022 Toyota RAV4 with flush mounted rails is going to be made by Rhino Rack. This roof rack has integrated locks to secure it from theft. The crossbars are 49" aero bars that fit almost all accessories. This Roof Rack Includes: Rhino-Rack Vortex Aero Crossbars - Aluminum - Black - 49" Long - Qty 2 item # RRVA126B-2 Custom RCP Fit Kit for 4 Rhino-Rack RC and RV Series Roof Rack Legs - Fixed Mounting Points item # RR42SV RCH Legs for Rhino-Rack Crossbars and...
view full answer... - Roof Rack to Carry 4 Kayaks on a 2019 Toyota HighlanderThe best option for being able to carry 4 kayaks on the roof of your 2019 Toyota Highlander is to use an aftermarket roof rack with the Thule Stacker # TH830 like you've been told. The adapters that you have seen are for different roof rack setups and wouldn't really do you any good (plus they'd add height to your current setup). A most cost-effective alternative to the Thule and Yakima options comes from Rhino-Rack. I think you were hinting that you have the naked roof with fixed mounting...
view full answer... - How to Use the Rhino-Rack Vortex Aero Crossbars on a 2017 Toyota HighlanderThe correct Rhino-Rack fit kit for your 2017 Toyota Highlander is the Custom RCP Fit Kit for 4 Rhino-Rack RC and RV Series Roof Rack Legs part # RRRCP37-BK which uses the fixed mounting points on your roof. However, you will also need the RCH Legs for Rhino-Rack Crossbars and Pioneer Platforms part # RRRCH4 in order to use your Rhino-Rack Vortex Aero Crossbars part # RRVA137B-2. The Rhino-Rack 2500 Series Legs you have will not work the above fit kit which is required for your Highlander.
view full answer... - Can Rhino-Rack Vortex Aero Crossbars Carry a Roofnest Sparrow Adventure XL TentThe Rhino-Rack Vortex Aero Crossbars - Aluminum - Black - 49" Long # RRVA126B-2 have a capacity of 165-lbs, which is the highest available for your 2021 Toyota RAV4, so you will be limited to that weight when loading items on the roof rack. Since your Sparrow Adventure XL tent weighs 150-lbs alone, you'll eat up most of the capacity with that. You will always be limited to the lowest rated component in your setup and in this case it appears that the roof of the RAV4 is only rated for...
view full answer... - Best Value Roof Rack And Kayak Carrier With Load Assist For 2019 Ford ExplorerI have the perfect roof rack option with the best value for the 2019 Ford Explorer. I recommend the Rhino Rack Aero Bar Roof Rack part # RRVA137B-2 for the bars, part # RRRCH4 for the legs, and part # RRRCP45-BK for the fit kit. The Rhino Rack roof racks are cost effective without compromising on quality. The aerodynamic bars of this particular setup will cut down on wind noise and they also look great. The weight capacity of the bars is 165 lbs which is more than most brands we carry....
view full answer...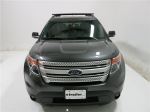
- Can Two Thule Hullavator Pro Kayak Carriers Be Installed On a 2020 Chevy TahoeI do have an option for you to use one Thule Hullavator Pro Kayak Carrier part # TH898 on a 2020 Chevrolet Tahoe but you would not be able to use two because there would not be a crossbar long enough that could support this much weight. I recommend the Rhino-Rack Vortex Aero Crossbar System part # RRVA150B-2, part # RRRCH4, and part # RRRCP43-BK. I then recommend swapping out one of the Thule Hullavator Pro Kayak Carriers for the Yakima JayLow Kayak Carrier part # Y04073.
view full answer... - Recommended Roof Rack for 2019 Chevy Tahoe and 16 Foot CanoeIt sounds like you are wanting a roof rack for your 2019 Chevy Tahoe. I recommend the Rhino-Rack roof rack consisting of: Rhino-Rack Vortex Aero Crossbars - Aluminum - Black - 59" Long - Qty 2 # RRVA150B-2 RCH Legs for Rhino-Rack Crossbars # RRRCH4 Custom RCP Fit Kit # RRRCP43-BK This system is rated for 220 lbs total capacity versus the Yakima 165 lbs or the Thule 150 lbs for this vehicle. The Vortex bars will work with your kayak carrier, canoe carrier, and cargo box. It sounds like...
view full answer... - 2021 Toyota Highlander Parts Needed to Add Rhino-Rack Pioneer Platform RackTo add a Rhino-Rack Pioneer on your 2021 Toyota Highlander we will need to utilize the flush rails as there isn't a Backbone system for your vehicle. Here are the parts you'll need: 60"x 49" Pioneer Platform - # RR35TB RCH Legs - # RRRCH4 RCP Fit Kit - # RR66QT Attached is a video of a similar installation of the Rhino-Rack roof rack system on a 2018 Highlander so you can get an idea of how the fit kit and legs install on the rails.
view full answer... - Parts Needed to Install Flat Roof Rack Tray on 2018 Chevy TahoeTo install a flat roof rack platform on your 2018 Chevy Tahoe you would need Rhino-Rack Vortex Aero Crossbars # RRVA150B-2, RCH Legs # RRRCH4 and Custom RCP Fit Kit # RRRCP43-BK. Then you will be able to use 2 of the Pioneer Platform Mounting Kits # RR43105 to attach the Rhino-Rack Pioneer Platform Roof Tray # RR45TB.
view full answer... - Best Roof Rack for a 2022 Toyota RAV4 w/ Side Rails Using a Thule HullavatorI have a great roof rack system for your 2022 Toyota RAV4 that will work with your Thule Hullavator Pro Kayak Carrier item # TH898. The crossbars will be longer than the standard 49" item # RRVA126B-2 so the Hullavator can function. It is the 2022 Toyota RAV4 Roof Rack by Rhino Rack and it Includes the following parts: Rhino-Rack Vortex Aero Crossbars - Black - 59" Long - Qty 2 item # RRVA150B-2 - ONLY FOR HULLAVATOR Custom RCP Fit Kit for 4 Rhino-Rack RC and RV Series Roof Rack Legs...
view full answer...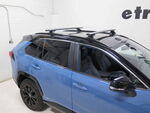
- Recommended Cross Bars for 2017 GMC YukonRhino Rack and Thule both make great roof racks that are similar in quality, looks, and function. Typically, the Rhino Rack products tend to be more cost-effective. We actually don't have any Thule crossbars that will fit your 2017 GMC Yukon XL. I recommend the Rhino Rack Vortex Aero Crossbars # RRVA150B-2 with the RCH Legs # RRRCH4 and the Custom RCP Fit Kit # RRRCP43-BK. These are 59" aerodynamic-style crossbars that install onto the flush mounted rails on your vehicle. They also come...
view full answer... - Correct Rhino-Rack Roof Rack Parts for a 2017 Chevy TahoeThose Rhino-Rack crossbars and legs will fit your 2017 Chevy Tahoe, yes, but you also need a fit kit to complete the roof rack system. Here is the full parts list: 59" Vortex Crossbars - # RRVA150B-2 RCH Legs - # RRRCH4 RCP Fit Kit - # RRRCP43-BK I'm not a fan of how we organize our videos so I can completely understand where you're coming from. We do, however, have an installation video of this exact system on a 2019 Chevy Suburban that I'm linking for you to reference.
view full answer... - Recommended Roof Rack for a 2015 Cadillac Escalade w/ Side RailsTo mount the Thule Force XT XXL Rooftop Cargo Box item # TH6359B you will need to add a roof rack to your Escalade. It looks like the 2015 models came with flush mounted rails that run front to back. You will want the roof rack by Rhino Rack and it includes the following parts: Rhino-Rack Vortex Aero Crossbars - 59" Long - Qty 2 item # RRVA150B-2 RCH Legs for Rhino-Rack Crossbars - Qty 4 item # RRRCH4 Custom RCP Fit Kit for 4 Rhino-Rack RC Fixed Mounting Points item # RRRCP43-BK This...
view full answer...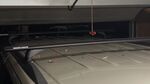
- Roof Rack Recommendation for 2016 Jeep Grand Cherokee Altitude with Metal Flush Roof RailsFor your 2016 Jeep Grand Cherokee that has the E Group style roof flush rails we have the Rhino Rack Aero Bar roof rack part numbers # RRVA126B-2, # RRRCH4, and # RRRCP27-BK that will work well.
view full answer... - Roof Rack that Fits 2021 Toyota Highlander with Flush RailsFor your 2021 Toyota Highlander with flush roof rails we have the Yakima Jetstream roof rack that consists of part numbers # Y00425, # Y53TR, and # Y66VR which uses a very similar foot to the Rhino Rack you mentioned but at this time we do not have a Rhino Rack roof rack that fits your vehicle.
view full answer... - Roof Rack Compatible With Carrying Two 17 Foot Canoes On A 2017 Toyota Highlander XLEFor your 2017 Toyota Highlander, I recommend the Roof Rack by Rhino Rack. This vehicle's suggested roof rack includes the Rhino-Rack Vortex Aero Crossbars - Aluminum - Black - 54" Long - Qty 2 # RRVA137B-2, the RCH Legs for Rhino-Rack Crossbars and Pioneer Platforms - Fixed Mounting Points # RRRCH4, and the Custom RCP Fit Kit # RRRCP31-BK. I also recommend the metal lock cores # RRVA-LEC4. This rack has a rated capacity of 175 lbs and is not restricted by canoe length with the 28 inch...
view full answer... - Compatibility of 65 Inch Long Aero bars for 2015 Chevy SuburbanSure thing. For your 2015 Chevy Suburban, you can use the following components to get your 65 inch aero bars: Rhino-Rack Vortex Aero Crossbars- 65" Long # RRVA165B-2 Metal Cores # RRVA-LEC4 RCH Legs - Fixed Mounting Points # RRRCH4 Custom RCP Fit Kit # RRRCP43-BK This will give you 65 inch long aero bars on your Suburban. It will utilize the same confirmed fit legs and fit kit of the 59 inch roof rack system confirmed to fit your 2015 model.
view full answer... - Roof Rack System Compatible With 2019 Toyota Highlander And Malone Load Assist Kayak CarrierIf you have rails on your roof you can use this Rhino-Rack crossbars # RRVA137B-2, Foot kit # RRRCL4 and Fit Kit # RRRCP31-BK. If you have a naked roof you'll need to get these crossbars # RRVA126B-2, foot kit # RRRCH4 and fit kit # RRRCP37-BK. The Malone DownLoader Kayak Carrier and TelosXL Load Assist # MPG114MD-351XL will fit these crossbars no problem! These will be a good fit for you as they are a great system but won't break the bank.
view full answer... - Does Rhino Rack Roof Rack Vortex Aero Crossbars Fit 2017 Ford Explorer with Flush RailsWhat you are describing is a flush rail installed on the roof of your 2017 Ford Explorer. The Rhino Rack roof rack part numbers # RRVA137B-2, # RRRCH4, and # RRRCP45-BK is confirmed as a fit for exactly what you described so this would fit and work well for you.
view full answer... - Can Yakima SkyBox 12 Fit Rhino Rack Roof Rack of 2017 Ford ExplorerThe Yakima SkyBox 12 # Y07334 fits more than just the Yakima rack roof racks. It would fit a Rhino Rack roof rack like the # RRVA137B-2, # RRRCH4, # RRRCP45-BK quite well. The Rhino Rack bars are very similar in shape to the Yakima bars.
view full answer... - How To Carry a Canoe On a 2016 Ford ExplorerIn order to carry a canoe on a 2016 Ford Explorer you'll first need to start with a roof rack, the Rhino-Rack Vortex Aero Crossbar System part # RRVA137B-2, part # RRRCH4, and part # RRRCP45-BK is a great cost effective option. In order to secure the canoe, the Lockrack Adjustable Watersport Carrier part # LR54FR is what I recommend as it's one of the very few options which can be locked.
view full answer... - Could 59” Rhino Rack Aero Cross Bars Fit on 2017 Ford ExplorerSince the track on the underside of the Rhino Rack crossbars does not run the full length of the bar and it is what the feet of the rack attach to we can't guarantee you'd be able to fit the longer bars on your rack. I can say that when we installed the 54 inch rack part numbers # RRVA137B-2, # RRRCH4, and # RRRCP45-BK on a similar Explorer we found there was several inches further to the inside that the feet of the rack could attach to so I would be inclined to believe that the longer...
view full answer... - Best Value Roof Rack And Kayak Carrier With Load Assist For 2019 Ford ExplorerI have the perfect roof rack option with the best value for the 2019 Ford Explorer. I recommend the Rhino Rack Aero Bar Roof Rack part # RRVA137B-2 for the bars, part # RRRCH4 for the legs, and part # RRRCP45-BK for the fit kit. The Rhino Rack roof racks are cost effective without compromising on quality. The aerodynamic bars of this particular setup will cut down on wind noise and they also look great. The weight capacity of the bars is 165 lbs which is more than most brands we carry....
view full answer... - Does Rhino Rack Roof Rack Vortex Aero Crossbars Fit 2017 Ford Explorer with Flush RailsWhat you are describing is a flush rail installed on the roof of your 2017 Ford Explorer. The Rhino Rack roof rack part numbers # RRVA137B-2, # RRRCH4, and # RRRCP45-BK is confirmed as a fit for exactly what you described so this would fit and work well for you.
view full answer... - Can Yakima SkyBox 12 Fit Rhino Rack Roof Rack of 2017 Ford ExplorerThe Yakima SkyBox 12 # Y07334 fits more than just the Yakima rack roof racks. It would fit a Rhino Rack roof rack like the # RRVA137B-2, # RRRCH4, # RRRCP45-BK quite well. The Rhino Rack bars are very similar in shape to the Yakima bars.
view full answer... - Recommended Roof Rack To Mount Roof Top Tent To 2018 Ford ExplorerI have a solution for you, however, there are not any platform racks that attach to the roof of your 2018 Ford Explorer so you will want to go with a standard crossbar setup. I have not seen any negative feedback from attaching a rooftop tent to crossbars, so rest assured that the tent will not fall off if properly installed. If your Explorer has raised roof rails then you can go with Inno Aero Crossbars Black - 54" # INXB138-2 along with the necessary Feet # INXS350 and Fit Kit # IN28FR....
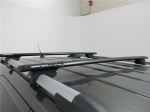
view full answer... - Recommended Roof Rack for 2019 Ford Explorer with Flush Side RailsIn order to put crossbars on the flush mounted side rails of your 2019 Ford Explorer you'll want to use the Rhino Rack # RRRCH4 feet with # RRRCP45-BK fit kit and the Rhino Rack Vortex Aero Crossbars # RRVA137B-2. Rhino Rack offers a similar quality and durability of the more expensive roof racks at a much better price point and they will allow you to carry a kayak carrier Thule Hull-A-Port # TH834. This Rhino Rack will mount to the fixed mounting points on your flush mounted side rails...
view full answer...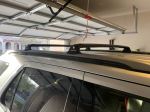
- Can Thule Rapid Traverse Feet Be Used on Flush Side Rails on 2016 Ford ExplorerI have a solution for you, but the Thule Rapid Traverse Feet # TH480R are not designed to fit on flush mounted roof rails, so there's not a fit kit that will allow this; additionally, your older square bars will not fit in the feet that are available for your 2016 Ford Explorer. For these reasons, if you wanted an aftermarket roof rack for your 2016 Ford Explorer so that you've got flat bars, you would need to get an entirely new system. If you wanted to go the aftermarket route, I recommend...
view full answer... - Roof Rack for 2017 Ford Explorer Compatible With Thule Hullavator ProThere is a roof rack for your 2017 Ford Explorer that is compatible with the Thule Hullavator Pro Kayak Carrier and Lift Assist # TH898, although the 53 inch bars of the Rhino-Rack system are not going to be quite long enough to work. Due to that, in order to get long enough bars you will need to go with the Yakima roof rack. The reason is due to how crossbars mount; they foot pack that attaches to the bars slides into a channel underneath the crossbars. That channel on the Rhino-Rack...
view full answer...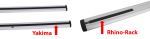
- What Parts do You Recommend to Install the Thule Pulse L # TH615 to My 2018 Ford Explorer? If you are looking to install the Thule Pulse L # TH615 on your 2018 Ford Explorer XLT, you will need a crossbar system. If you have factory crossbars or crossbars already installed on your Explorer, the clamps on the Pulse will grasp the bars if your crossbars measure no greater than 3-5/16" wide x 1-1/2" tall. In order to make sure you have the correct dimensions, I recommend measuring your crossbars. If you have flush factory rails without crossbars installed, I recommend the Rhino-Rack...
view full answer... - Do Yakima and Thule Accessories Fit Rhino-Rack CrossbarsAs long as the crossbar spread is within the range of the Thule or Yakima accessory there will be no issues mounting it to Rhino-Rack crossbars. Most accessories fit round, square, aero, elliptical and factory crossbars. For example, if you added the Rhino-Rack Roof Rack # RRVA137B-2, # RRRCH4, and # RRRCP45-BK to your 2017 Ford Explorer the # TH615 you looked at would fit the Vortex Aero Crossbars. You would need to make sure that the crossbar spread was 23-5/8" - 34-3/8" which is what...
view full answer... - Recommended Roof Rack for a 2019 Ford Explorer XLT W/ Flush Mounted RailsSo I can definitely see the concern but the weight rating that you're looking at for our roof racks are going to be the dynamic weight rating, meaning the max weight those bars can handle while in motion. When you're parked the weight rating increases dramatically since the weight won't be moving and will be supported by the axles. With that being said, something like the Rhino-Rack Vortex Aero Crossbars # RRVA137B-2 with the RCH Legs for Rhino-Rack Crossbars and Pioneer Platforms # RRRCH4...
view full answer... - Is There A Third Rail Option Available For The Rhino-Rack RVP Roof Rack On A 2016 Ford Explorer?I went ahead and checked to see if a single bar was available for the Rhino-Rack RVP Roof Rack for Fixed Mounting Points # RRRVP45, and unfortunately a single bar kit is not offered for this system. With that being said, to add a third bar you'll need to piece together everything. For the bar you'll need to contact Rhino-Rack as they don't sell singles for this system. However, for the remainder of the kit you'll need a fit kit # RRRCP45-BK, and legs # RRRVH2. As for a keyed alike option,...
view full answer... - Will Rhino Rack Installed on 2018 Ford Explorer Allow Sun/Moon Roof to OpenWith the Rhino Rack roof rack part # RRVA137B-2, # RRRCH4, and # RRRCP45-BK installed on your 2018 Ford Explorer there are no restrictions on opening the sun/moon roof but if you were to do this with the rack installed you most likely find that the wind noise is going to be loud enough you'd want to keep it shut. If you check out the picture I attached you can see there would be plenty of clearance for the roof to open. The picture is a 2018 Explorer like yours with this rack installed...
view full answer...
- Thule Canyon XT Roof Cargo Basket Mounting for 2017 Ford ExplorerThe Thule # TH859XT-8591XT Canyon XT Roof Cargo Basket is designed to attach to crossbars. I'd recommend a Rhino-Rack crossbar setup, which is assembled using the following parts: • Rhino-Rack 54 inch aero crossbars, part # RRVA137B-2 • RCH Roof Rack Legs, part # RRRCH4 • RCP Fit Kit for Roof Fixed Mounting Points, part # RRRCP45-BK With the rack in place, the basket will bolt to the rack. I've linked to an install video showing the basket being installed on a 2018 Ford Explorer.
view full answer... - Can Thule Artificial RainGutters Be Installed on the Roof of a 2016 Ford ExplorerI have a solution for you, but you cannot mount the Thule # TH542 on the roof of your vehicle and still have a secure mounting point for the towers of a roof rack. From what I was able to determine, the 2016 Ford Explorer came standard with flush mounted roof rails. For this reason you can use the Rhino Rack # RRRCP45-BK, # RRRCH4 and # RRVA137B-2 to give yourself a complete roof rack for your Explorer.The Rhino Rack is a great option because it provides you with a high quality and durable...
view full answer... - Recommended Roof Rack For 2017 Ford Explorer That Will Accommodate A Roof Top TentI have a solution for you, but there are not any roof racks for your 2017 Ford Explorer that are rated for 190lbs when vehicle is in motion. I will give you a few roof rack recommendations so you are aware of your options. If your 2017 Ford Explorer has factory raised rails running front to back then you will want to go with Inno Aero Crossbars - Aluminum - Black - 51" Long # INXB130-2 along with the necessary Feet # INXS350 and Fit Kit # IN28FR. This has the highest weight capacity available...
view full answer... - How To Carry Two Kayaks On a 2016 Ford Explorer With Glass RoofI have just what you need to carry two kayaks on a 2016 Ford Explorer. In order to maintain the roof weight capacity you will indeed need to carry most of the weight on the hitch with the Rhino-Rack T-Load Hitch Mounted Load Assist part # RTL002. Then you can support the bow/stern directly on the roof with a roof rack like the Rhino-Rack Vortex Aero Crossbar System part # RRVA137B-2, part # RRRCH4, part # RRRCP45-BK. I have attached a selection of our kayak carriers for you as well such...
view full answer... - Largest Rhino Rack Pioneer Platform that Fits 2016 Ford ExplorerRhino Rack doesn't have the larger Pioneer platform trays available for your 2016 Ford Explorer since they don't have any direct mount options using their Backbone system, but they do have universal style Pioneer trays that attach to their crossbar kits for your vehicle part numbers # RRVA137S-2, # RRRCH4, # RRRCP45-BK like with the part # RR42115BF which is 58 inch by 47 inch.
view full answer... - Best Roof Rack for 2019 Ford Explorer with Flush Roof Rails and MoonroofFor your 2019 Ford Explorer with moonroof and front-to-back flush roof rails I recommend the Rhino-Rack Vortex Aero roof rack system because of its proven quality, quieter operation and because this black rack will provide an appearance more like a costlier factory rack. Rhino-Rack products also offer excellent value for the dollar as compared to other premium roof rack brands. The system consists of parts # RRVA137B-2, # RRRCH4 and # RRRCP45-BK and you can see an Explorer installation...
view full answer...
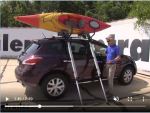
- Roof Rack/Kayak Carrier For A 2017 Ford Explorer And A 2014 Subaru ForesterGood morning, Donna. So, according to Malone, the # MPG217 roof rack does not fit the factory raised side rails on a 2017 Ford Explorer. I would have to offer you a different roof rack for this vehicle like the Rhino Rack # RR98VE. You can use a Malone rack on the factory raised side rails on the 2014 Subaru Forester, but the 65" bars are too long. The longest bar recommended for this vehicle is a 58", the # MPG216. You can definitely carry two kayaks using this setup. The Yakima Sweet...
view full answer...
Do you have a question about this Roof Rack?
Info for this part was:

Edited by:
Daron K

Updated by:
Alex H

Written by:
Bethann B
At etrailer.com we provide the best information available about the products we sell. We take the quality of our information seriously so that you can get the right part the first time. Let us know if anything is missing or if you have any questions.
Product Experts Available Now!
Call 1-800-940-8924
Thank you! Your comment has been submitted successfully. You should be able to view your question/comment here within a few days.
Error submitting comment. Please try again momentarily.